Subject: Latest workshop heater Sat Dec 27, 2014 3:45 am
Thought id put all the videos together here.
Been burning for 2 days now time to share a few findings.
Last edited by ppotty1 Admin on Wed Dec 31, 2014 11:59 am; edited 2 times in total
ppotty1 Admin Admin
Posts : 241 Join date : 2013-09-30
Subject: Re: Latest workshop heater Sat Dec 27, 2014 4:08 am
There are differences between steel and refractory risers that is clear now, only really had 2 proper burns in the stove but a pattern is emerging.
Negative..... This riser is slower to respond when lighting and takes about 15 mins before it starts really punching out the heat. I have since insulated the firebox which has slowed things down a little more on start up.
Positive... Once the riser and firebox are up to temp I can reduce the air intake and to my surprise the temps of the exchanger start to rise even more!
My analysis.... Obviously the casting takes longer to heat but once hot it retains the heat as does the firebox, the firebox takes more time insulated to heat up the air supply but once the lining is super hot it holds the heat super heating the incoming air. When I slow down the draught the air moves slower through the preheating stage getting even hotter and then enters the firebox. This is causing Gasification of the timber more so than ever before, the sec air is igniting this inside the riser which in turn is holding the heat it has soaked up. and because of the slower draught through it and through the flue system is releasing more heat into the exchanger.
ppotty1 Admin Admin
Posts : 241 Join date : 2013-09-30
Subject: Re: Latest workshop heater Sat Dec 27, 2014 4:31 am
This afternoon I really blasted the heat through the stove, ran it full draught with two fireboxes full of fuel about 1.5 5 gallon buckets. after the first full load the top of the exchanger started to bow upwards in the centre and was blue in colour. I figured the riser was dry enough so kept going. I was going to weld another plate underneath the lid over the riser and at this point i wished i had.
The heat coming from the stove was incredible so much so the varnish on the side of the bench was starting to smell and blister. At that point I closed the air down half way with the temps at top reading 650c it was then I realised the heat was now rising even more. I piled a load of steel on top of the stove to cool things down and also to push down the bulge. Also had to open the workshop door as the temps inside were just too hot, some of the paint tins at the back of the shop were expanding and making noises!
the devil in me was testing the riser to see if it could stand the punishment and so far it seems good. Left the stove ticking over tonight with one big fat log inside watched the gasses venting over the top of it and igniting near the glass.
gadily Moderator
Posts : 1477 Join date : 2013-12-08
Subject: Re: Latest workshop heater Sat Dec 27, 2014 5:02 am
thanks for posting this up
however i believe you should mention about meths being poured onto a flame as i know meths can flare up i wouldnt advise using a bottle of meths but to use the cap instead to pour in the meths a bit more safer
also noted exterior air coming into the system than a room system to fill the air into it should be alot warmer than having an air brick or an air feeder pipe into the building
nearly forgot to mention where you put the round bars at bottom i would suggest more fins like at the side you will then really heat the air passing over them causing more push for venting air into the top end
gadily Moderator
Posts : 1477 Join date : 2013-12-08
Subject: Re: Latest workshop heater Sat Dec 27, 2014 5:08 am
ppotty1 Admin wrote:
The heat coming from the stove was incredible so much so the varnish on the side of the bench was starting to smell and blister. At that point I closed the air down half way with the temps at top reading 650c it was then I realised the heat was now rising even more. I piled a load of steel on top of the stove to cool things down and also to push down the bulge. Also had to open the workshop door as the temps inside were just too hot, some of the paint tins at the back of the shop were expanding and making noises!
the devil in me was testing the riser to see if it could stand the punishment and so far it seems good. Left the stove ticking over tonight with one big fat log inside watched the gasses venting over the top of it and igniting near the glass.
i would consider looking at a hot water system for the top sounds to me that your system can take the water side of it and pump it out better
ppotty1 Admin Admin
Posts : 241 Join date : 2013-09-30
Subject: Re: Latest workshop heater Sat Dec 27, 2014 8:47 am
It was not meths i poured to get it started it was white spirit its not so flammable that the flame could run up it like someone else mentioned, done this hundreds of times to get fires started.
jimmyTK
Posts : 4 Join date : 2014-12-24
Subject: Re: Latest workshop heater Sat Dec 27, 2014 9:25 am
By the sounds of the heat commin out of this one, she should be realy good on the amount of wood needed.
jimmyTK
Posts : 4 Join date : 2014-12-24
Subject: Re: Latest workshop heater Sat Dec 27, 2014 9:54 am
Did you insulate between the fire box and heat exchanger? I never noticed on any of the videos...
ppotty1 Admin Admin
Posts : 241 Join date : 2013-09-30
Subject: Re: Latest workshop heater Sat Dec 27, 2014 10:27 am
yes jimmy I put some insulation at the rear inside of the firebox yesterday, the side that fits to the exchanger.
gadily Moderator
Posts : 1477 Join date : 2013-12-08
Subject: Re: Latest workshop heater Sat Dec 27, 2014 10:43 am
ppotty im now wondering if the top may cause issues and i wonder if it maybe better to change it to the core mix around the riser pipe and just other them in one way to stop a blasting of the metal but also protecting the top from very high heat
high temps and that thickness of metal and your gonna chew right through the top as i would think im thinking a replaceable round circle to be placed at the top of the riser in the core material that was used
ppotty1 Admin Admin
Posts : 241 Join date : 2013-09-30
Subject: Re: Latest workshop heater Sat Dec 27, 2014 11:11 am
yes tomorrows job is to take the top off and weld another plate of 10mm steel to the underside of the lid, i was going to do that like I said guess i was just rushing too much to get it in, no harm done and i wont need to burn that hot in future. Can look at the riser too when the lid is off see if there is any cracks. Im phoning castletree kiln co after christmas and see if they can suggest a mixture to cast a thinner riser i may cover it with a metal outer and insulate with perlite if they can.
Rebootag
Posts : 39 Join date : 2014-11-30 Location : Tivoli, NY
Subject: Re: Latest workshop heater Sat Dec 27, 2014 1:37 pm
@ ppotty... I love your design... very well thought out and laid out. Thanks for sharing!
caotropheus Subscribers
Posts : 333 Join date : 2013-10-07
Subject: Re: Latest workshop heater Sat Dec 27, 2014 3:13 pm
Mr. ppotty1,
Your description is very impressive for the amounts of heat the stove produces. The beautify bit for me is that the stove is naturally aspirated, not forced air. Two things, unlike an engine, there are more and more home made experiments that seem to show that there are some advantages to bring pre-heated air to the primary combustion of the rocket stove. And it seems that the hotter this air gets to the primary combustion, the better. Just take a look at your stove and at Barnabe's stove. Second, I suggest we organise ourselves, improve even more the stove and manage to get a way to send you + the stove to this competition
keepittoasty
Posts : 113 Join date : 2014-11-13
Subject: Re: Latest workshop heater Sat Dec 27, 2014 5:20 pm
Nice work and great explanation of what you did. Thanks for taking the time to share. I can't wait to see more after you have some more burns in it! Looks like the extra work you put in to really preheat the air and all that mass in there is paying off. Great job, May it keep you warm and cozy!
keepittoasty
Posts : 113 Join date : 2014-11-13
Subject: Re: Latest workshop heater Sun Dec 28, 2014 5:33 am
Hey Ppotty1, Im watching these over and over, great vids! So I see that your make up air comes from outside, but what about the secondary air? is there any reason that doesn' t come from outside as well? Is it because it is such a tiny amount or is there another reason?
gadily Moderator
Posts : 1477 Join date : 2013-12-08
Subject: Re: Latest workshop heater Sun Dec 28, 2014 6:49 am
i agree with your comment keepittoasty
i believe that more heat can be gained with the secondary air being preheated and super heated before injection into the vortex area
preheating the air is a good thing but super heating the secondary air would improve this system even further and id use box section to do so at the side of the system though i suspect you would have to create another hole to the outside as well instead of being inside
on another note sorry to seem to be pulling it apart
if you use firebrick inside of the firebox you are then reflecting the heat back inside of the firebox wouldnt that mean the air channels behind the firebox wouldnt be getting as hot therefore the heated primary air would be much lower entering the firebox
also with this build havent you lost the ability to burn wood shavings and sawdust unless you create a door above the ash pan for your channel under the sawdust the ash pan can still be used
id use a door infront of the ash pan drawer instead of twist locks for ash pan drawer just gives a better seal
ppotty1 Admin Admin
Posts : 241 Join date : 2013-09-30
Subject: Re: Latest workshop heater Sun Dec 28, 2014 12:21 pm
Rebootag wrote:
@ ppotty... I love your design... very well thought out and laid out. Thanks for sharing!
Thanks mate.
caotropheus wrote:
Mr. ppotty1,
Your description is very impressive for the amounts of heat the stove produces. The beautify bit for me is that the stove is naturally aspirated, not forced air. Two things, unlike an engine, there are more and more home made experiments that seem to show that there are some advantages to bring pre-heated air to the primary combustion of the rocket stove. And it seems that the hotter this air gets to the primary combustion, the better. Just take a look at your stove and at Barnabe's stove. Second, I suggest we organise ourselves, improve even more the stove and manage to get a way to send you + the stove to this competition
Caotropheus I think the key is now to get the firebox as hot as is possible with insulation and very hot pre-heated air, im posting a vid tomorrow showing the stove stripped and a few temporary changes I have made today. The difference in todays burn was very impressive I dont think you could extract any more energy from wood than I did today Id have a good guess that the air was coming into the firebox at over 300c and just cooking the timber it was great to observe and feel the heat it produced. I watched both videos you linked to and I think with some more work on this design it may surpass what the guys in the stove comp where aiming for. The design would need changing but it is possible. something along the lines of the last stove I built with the sideways burn into the boiler section.
keepittoasty wrote:
Nice work and great explanation of what you did. Thanks for taking the time to share. I can't wait to see more after you have some more burns in it! Looks like the extra work you put in to really preheat the air and all that mass in there is paying off. Great job, May it keep you warm and cozy!
keepittoasty wrote:
Hey Ppotty1, Im watching these over and over, great vids! So I see that your make up air comes from outside, but what about the secondary air? is there any reason that doesn' t come from outside as well? Is it because it is such a tiny amount or is there another reason?
Thanks I had planned on connecting the sec air to the air passage below it with just one more elbow turning it down and in, I thought later it was a bit unnecessary as the section inside was more than enough to pre heat the air, and like you say the amount of air entering is tiny. The end of the pipe sticking out is over 300c the copper is just soaking up the heat sitting next to the base of the riser. I put my ear towards the pipe I could hear the combustion happen tonight inside the riser, like a torch sound when the primary was reduced so it is working well. The only thing i will change on the next riser is to have two outlets for the sec air at the riser base, one will be nearer the front of the burn tunnel.
gadily wrote:
i agree with your comment keepittoasty
i believe that more heat can be gained with the secondary air being preheated and super heated before injection into the vortex area
preheating the air is a good thing but super heating the secondary air would improve this system even further and id use box section to do so at the side of the system though i suspect you would have to create another hole to the outside as well instead of being inside
on another note sorry to seem to be pulling it apart
if you use firebrick inside of the firebox you are then reflecting the heat back inside of the firebox wouldnt that mean the air channels behind the firebox wouldnt be getting as hot therefore the heated primary air would be much lower entering the firebox
also with this build havent you lost the ability to burn wood shavings and sawdust unless you create a door above the ash pan for your channel under the sawdust the ash pan can still be used
id use a door infront of the ash pan drawer instead of twist locks for ash pan drawer just gives a better seal
Gadily you read my mind on the firebox lining and I covered that in the vid today it will be interesting for you as it was for me. I dont plan on burning sawdust in this stove as I just dont produce it in big enough amounts any more, the stuff i do make gets saved and used as bedding material for my birds. Cheers.
billandlori
Posts : 10 Join date : 2013-12-29
Subject: Re: Latest workshop heater Mon Dec 29, 2014 6:40 am
Very nice work ppotty!! Quite an inspiration.
Perhaps a sheet metal shield around the heat exchanger with an open bottom and top would create a convection to circulate heat around your shop.
Thanks for sharing!!
Bill
ppotty1 Admin Admin
Posts : 241 Join date : 2013-09-30
Subject: Re: Latest workshop heater Mon Dec 29, 2014 11:56 am
plenty of convection going on as is Bill, but i think the fins are a good idea, a guy on you tube said to angle them on the sides which makes alot of sense, i will do that and slope them towards the back of the shop. Cheers.
Gary B.
Posts : 48 Join date : 2014-03-18
Subject: Re: Latest workshop heater Tue Dec 30, 2014 9:30 am
I also really like your design. My large batch box stove Trying2hard just posted up for me is very much a copy of your last years stove as far as combustion. Anyway I absolutely agree: preheated combustion air (and entire batch box) is the most important thing in getting a clean burn and the most heat out of your wood. Like I said I used a lot of your ideas in my stove. Now I watched all of your videos both last stove and this new one. Well I noticed how the back wall of your batch box gets red hot so I put a two inch chamber on the whole back of my batch box, then I put my draft control under my stove base. Then I ran two 2 inch Stainless tubes from the back of my batch box (top) and ran them front to back with holes spaced entire length. I have since made each hole smaller and this helped keep my top window cleaner end to end instead of just above my burn tunnel. Anyway preheating design is working fantastic. Once my stove is hot. I control my burn with this over the fire super preheated air only. Just like you do. I also have a air control to my riser like yours. With my window looking right down my riser I can fine tune this to my wood load and as you said this really makes a big difference. Other things I noticed. Well you like to watch fires as I do. Well if you put a window with ceramic glass like mine directly over your riser it would solve your warping problem but more important you could monitor your riser burn. Mine has been north of 1800 F with no warping or cracking and it stays clean when rocketing. Many a neighbor has been amazed looking down my riser. I have watched my stove burn for a month now and now after trying all types of settings and different kinds of woods it comes down to exactly what you said in your last video. Burn the stove hard right away and get everything HOT. At this point the combustion air is very hot, batch box is hot and at this point you can adjust down your preheated air and yes the stove goes into a slow very hot burn. Most of the time in my stove fire is above the wood burning purple with orange tips on the flames. Yes it eventually gets down to the wood but very late in the burn cycle. I am burning less than half the wood I was and my shop is much warmer than my old stove burning twice as much wood. Now I get a lot of heat off my batch box. I am ok with that but many neighbors want a stove like mine. Well my stove is big and makes really big heat. My shop is 2000 square feet and this morning we had 12 below zero F and by 9:00 am I had my windows open as it was to hot in shop to work. So I may build a copy of yours as it will have the kind of heat out put they are looking for. I am hoping you will give dimensions of your stove and your heat tunnel riser as I think you nailed it this time. I copied your last burn tunnel riser as close as I could from your video where you state it is just that easy.
Thanks for that Gary B, sounds like we have both achieved the same goal, I tried the exchanger tubes from looking at your stove, would no fit top to bottom as yours are so had to modify them slightly. I would love to place stove glass over the riser I am just worried the heat might blow it to pieces but seeing yours I may have a go and try it. Your right that the temperatures of these are just insane when you look at the fuel you have used, over and above anything I have experienced so far with previous stoves on the same amount of fuel. I have found the primary air intake has a real sweet spot once the wood is gassing, too much is just a waste of fuel and lowers the temp slightly, I have marked the spot on my slider control now. I got there by measuring the air temp coming out of the exchange tubes on the sides, I rested a K type thermocouple probe in the air flow and watched the temps change as I moved the slider. it required less air than I thought it would when I was building this. Like you I had to open the door today when temps reached 29c inside with the same 3 small logs burning for over 2 hours, it is cold and wet on the paving outside the shop but I have a clear dry patch of paving that extends 2 feet from the outer wall which shows the heat stored inside now. I totally forgot to put the dimensions on the end of the video I will draw them up and put another short video up explaining it all. My only problem thus far is the gasket just over the riser entrance, I re-sealed it and all was fine until the firebox started gassing. I then noticed it had come back ! today I realised at that part of the entrance the gasses are venting down over it into the riser and it is taking the bulk of the heat. The gasket is literally baking hard and as the metal is moving slightly the gap appears again then closes when the fire is cool. Its hardly anything but annoys me, I will probably fit a s- steel collar to cover the entrance where the firebox and exchanger meet when I re do the firebox lining, that should solve that problem. As to the sooting of the glass yes it does do that slightly more on this stove as I have the air inlets more open and less directed to the glass but as soon as the firebox is up to temp any soot/ resin/tar has no chance of staying on the glass the air literally burns it off leaving it crystal clear, as you see above your riser. I will get the highest temp rated glass I can find and fit a piece to the top plate, fingers crossed I can then watch the magic inside. Cheers.
Thank you in advance for batch box and heat tunnel and riser dimensions. When I build my next stove (I will try and recreate these dimensions) It is my feelings that these three parts of the stove have to be right as they all work together. I watched your burn video at least 5 times and I am convinced you absolutely nailed it this time. Your reworking of the burn tunnel looks spot on. This new smaller opening to the riser with more pronounced flip really puts a great vortex into the riser. Your heat tunnel is also shorter than mine and I think that also is a part of the magic of your stove. I have to really get my stove wound up to get my stove to rocket, where yours rockets right out of the gate. Once I get mine rocketing everything works great but I can see there is room for improvement. Now here is my 2 cents worth. When I build my copy of your design I to want to build it in two pieces like yours. Matting the two sections together I would do it like I build my doors. I take and build out of 1 inch angle iron two separate boxes (one just inside the other) weld them on to one of the pieces of your stove. This is the female side. Then I build a male side which is 1 inch x 1/4 inch flat stock welded on edge (so looking down on it you see the 1/4 inch), make it to fit in the center of the 1 inch channel you have already built. Now line up and weld each part to each side of your stove so they match up as needed. Then I glue in a piece of 1 1/4 inch piece of fire rope in the angle iron channel. You kind of have to stretch the rope to get it into the channel. This gives a real nice seal even if things are changing in the heat as there is a lot of forgiveness. I have made doors like this for over 30 years and not one gasket has ever failed. If you look at the videos of my stove trying2hard posted up my explanation will make sense. There are pictures of my doors some have the frames just laying in the channel before I welded them on, also there is video of me opening my doors after completion. If you need a place to get the ceramic glass like mine let me know. My riser glass as in video cost $45. Thank you again.
gadily Moderator
Posts : 1477 Join date : 2013-12-08
Subject: Re: Latest workshop heater Thu Jan 08, 2015 11:00 am
i caught your update to the stove
so suggesting these things for you to think about
with your door id consider using metal all the way across it then you can insulate it but id put a smaller window on the front of it instead near the top as then you could still see the flames just front view but also fill from above with your stove a 4" x 4" window should be ample enough
but i prefer to see the flames from the system even if it means losing some heat
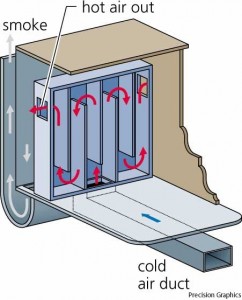
with your primary air i would really consider heating it via box pipe up and down a few times so it heats up more so inside of the system also you could do the same with secondary air into the system by using the box pipe method
using the method below
this method of above is effectively heating the air even more before release from the stove system and can be used by primary air and secondary air as well as the air within the workshop
your 5th vid 6th vid shows the build instructions to it
query from watching has your burn times increased from a box of wood quoted as 4 hrs for a full box of wood have yoiu gained any longer times with the new stove or does it take same amount of time
i also wonder if garys stove lasts longer on burn times and have we actually increased the burn times even more than the 4hrs
Gary B here. You brought up burn times. Here is what I can tell you. Last night here in Minnesota it was 15 below zero F. I put 3 splits of white oak(equivalent of one 20 inch long log 12 inches in diameter split three ways). Ok my stove had been burning all day so my stove was at operating temps (probe temp for batch box 1200F, riser probe temp 1000F). Anyway at 8:00 PM I put the above load of wood in my stove. My shop temp was 72 F. I returned to my shop the next morning at 7 AM. Well I still had nice bed of coals and the my shop temp was 71 F. My shop is large 40'x48' with a 10' side wall. This is a little less than half of the wood I would have burned to have same results in my old stove. Now just some info. All numbers above look perfect but they are a little deceiving. What I mean is during the night I am betting the temps in my shop could have soared to 80 F. This is ok for night long burns but during the day I often have my windows open. I only burn one piece of wood at a time during the day. My stove is acting like Ppotty's. When I adjust the preheated combustion air to near nothing my stove burns even hotter and at it cleanest. My fire is purple with just orange tips on the flames. So at this setting wood lasts the longest. Now what I am saying is it is hard to burn my stove at a temperature that is right for my shop. My windows are open a good share of the time when I am in the shop or it is just to hot to work. This is why I am going to build another stove with smaller batch box as I want to be able to burn even less wood as I am wasting some now. I like Ppotty's new stove I am planning to copy his design and throw a few new twists at it. My wheels are already turning.
Gadily.... Yes burn times have increased on this stove although a direct comparison with the old firebox is difficult as this firebox is smaller inside than the last one. I could have made it bigger but I dont need it bigger as it would waste fuel making the shop too hot, slowing the burn down increases the temps so you get more out of the fuel. or more from less.